


Dr. Jung-whan Baek (H Plastic Surgery)
.jpg)
Image 3. 3D printed implant.
As shown in <Image 3>, using the difference in density between the mesh and bone, I performed a virtual removal of the mesh while leaving the bone structure intact. A slight trace of the mesh remains but the actual distortion was within an acceptable range. Therefore, the image was converted to the STL file used in 3D printing. Using the STL file, 3D printing and implant modeling were simultaneously carried out.
.jpg)
Image 4. 3D printed life-size zygomztic bone of the patient.
The part needed in surgery was 3D-printed to examine the shape of defect with the naked eye rather than on computer screen. The general shape of the implant was created using dental putty before modeling (Image 4).

[Advertisement] Reandnè Thread Series – Manufacturer: GTG KOREA(www.gtgkorea.com)
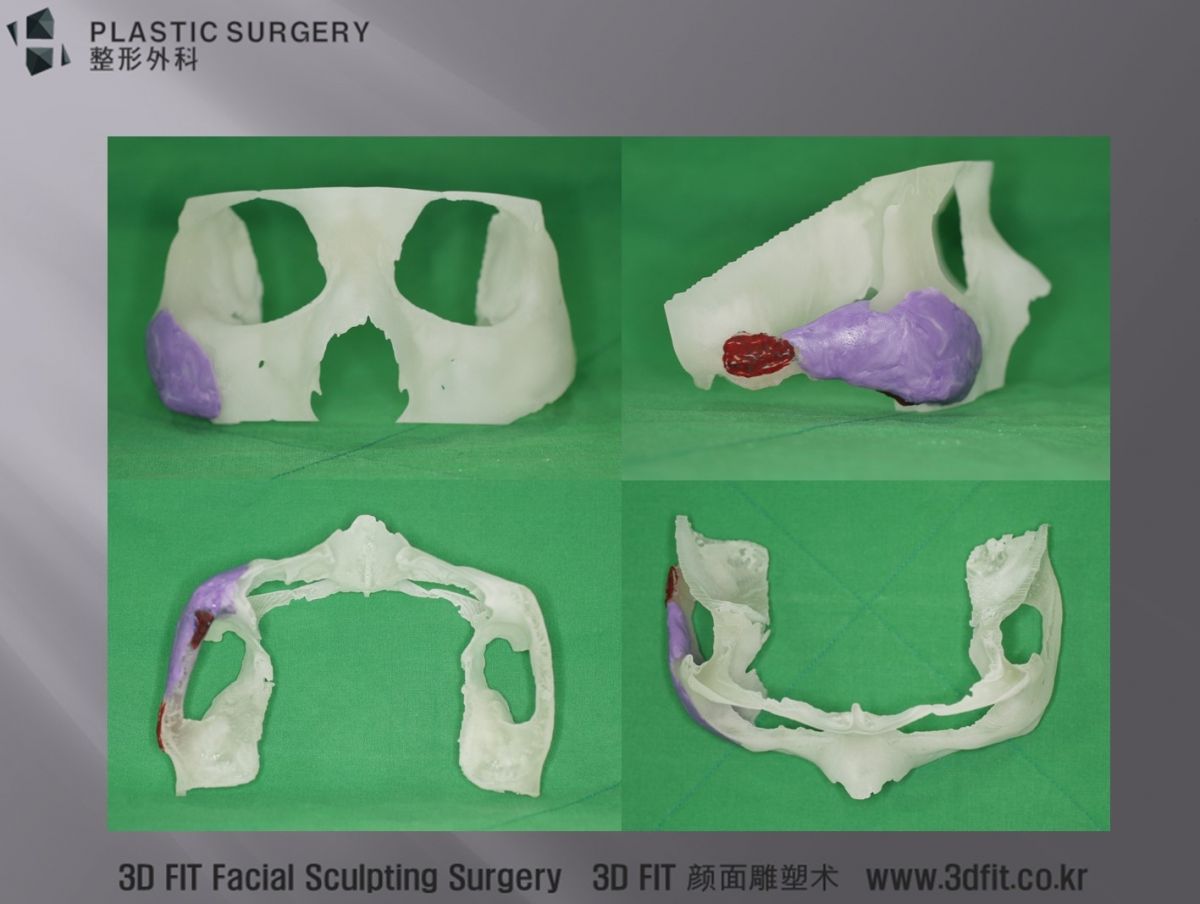
Image 5. Plan surgery based on the 3D printed implant
The area marked in purple in <Image 5> demarcates the defect that the implant will recover. The red area is the bone protrusion caused by bone union that requires resection during surgery. I think delivering the demands of a doctor to the 3D modeling engineer using the putty model ensures precision. In the absence of a professional modeler that processes medical data, the doctor cannot perform the tasks of a modeler efficiently. I think analogue methods can be used for more effective communication between important parties involved in the fabrication process. Modelling of the titanium implant was carried out based on this plan.
-To be continued