Test treatment
Not all doctors carry out test treatment. As the saying ‘you should look before you leap’ goes, it is safer to first test with a few vessels to see response rather than taking on diseased vessels all at once.
In test treatment, the doctor should check for allergic reactions as well as patient sensitivity to pain during injection of sclerosing agent, selection of the agent, determination of the concentration and treatment method, response to adhesive tapes, response to compression therapy, and patient’s adjustment to compression stockings, etc. In case of side effects, the doctor should provide sufficient explanation to his or her patient while showing pre-treatment photographs. After taking photographs of the treatment progress, begin the secondary treatment 2-6 weeks later to tackle larger areas.
Mapping prior to treatment
The visibility of the blood vessels depend on the patient’s position. Especially, the visibility varies more widely with V3 and V4 varicose veins. I prefer using black permanent markers to make markings before the surgery. In fact, V1 telangiectasia is rarely affected by the patient’s position and do not need to be marked before the treatment. However, a V2 disease needs to be mapped with a red water-based marker.
First, instruct the patient to take a supine position. It is not necessary to have the patient upright to expand the veins with gravity if the veins are readily visible in the supine position. Tilting the treatment bed about 30 degrees to let the blood rush to legs can sometimes make the veins more visible. I recommend this method to doctors that are starting out sclerotherapy for the first time.
To achieve successful sclerosis and consistent outcomes, a magnifying device, adequate illumination and stable, comfortable position are essential. Using a 2-3X magnifying loupe at 8-12 inch focal length improves viewing of the target area when treating small vessels. Many older phlebologists use a 2-3X loupe. It is helpful to maintain sufficient illumination over the treatment area with overhead spotlight equipment such as surgical light. In the US, innovative lighting devices such as ‘venoscope portable transillumination device’ uses two light sources illuminating the skin that brighten the target veins for injection.
It is also important to have ample space in the treatment room, a treatment bed whose height can be easily adjusted as well as a chair that helps comfortable movement of the doctor. These equipment facilitates the doctor’s work and improves the success rate of the treatment.
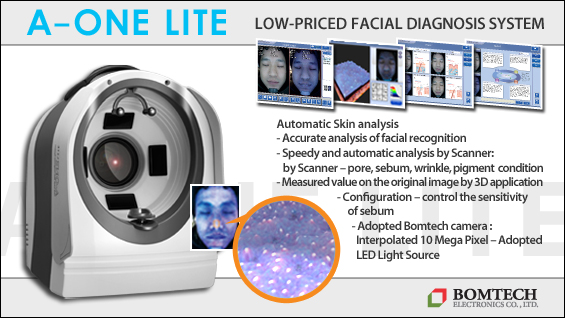
[Advertisement] A-One LITE(Facial Diagnosys System) – Manufacturer: BOMTECH(www.bomtech.net)
The skin of the treatment area should be thoroughly sterilized with 70% rubbing alcohol before injection. The sheen from rubbing alcohol makes the skin more translucent, lowers the white scale reflectivity of epithelial cells and increases the visibility of veins.
Place the treatment equipment on both sides of the treatment bed and the doctor should rest his or her arm on the armrest of the chair or treatment bed to minimize undesired shaking of the hand. The sitting position is more convenient and stable for the doctor during treatment than the standing position.
I prefer the 10ml glass syringe. It allows smooth injection with only a little pressure and air-block technique and foam sclerotherapy can be carried out. The air-block technique refers to injection of a small amount of air into the vessel to empty the blood vessels for treatment of telangiectasia or small vascular lesions before injecting the sclerosing agent. This reduces the risk of extravasation of the sclerosing agent and allows the agent to come in better contact with the endothelium without being diluted. It also minimizes extravasation of red blood cells.
I use the disposable 26 or 30 gauge needle for all injections. I also use 30G scalp needles in some cases. Smaller gauge needles (32 or 33 gauges) can be used in very thin veins. However, 32G or 33G needles are not disposable, are costly, easily damaged and dulled. With experience, small capillaries of 0.3mm thick can be easily injected with 26 gauge needles. Due to the elasticity of the blood vessels, injecting a needle larger than the vessel diameter is possible in some cases. Injecting the needle at 30~40°, almost parallel to the skin surface improves the success rate and reduces the risk of perforation of vessel walls by a needle.
Just as one uses the fingers of the other hand to steady the pool cue, resting the shaft of the syringe on the thumb prevents undesired shaking of the syringe during injection. Create tension on the injected area’s skin by spreading it tight with the thumb and index finger (2 finger method). If the skin is not tight enough with the 2 finger method, place the assistant’s finger on the skin to create a triangle to tighten the skin of the injection area (3 finger method).
Place the slant of the needle tip upward and tilt the needle shaft 30~45°. The needle is parallel to the skin surface 2-4mm away from the target vessel. Rely on the senses to inject the needle into the target vessel.
Insert the needle gradually and carefully by applying slight pressure on the syringe. Once the needle enters the vein, the venous pressure is lower than the surrounding tissues and this makes the injection of the sclerosing agent easy. As the blood vessels lie parallel and very close to the skin surface, it helps to slightly lift the skin with the needle to achieve successful sclerosis. A novice to sclerotherapy may not tilt the needle enough to stay close to the skin surface and insert the needle too deep into the skin. This increases the risk of treatment failure as well as complications and side effects.
One can check the insertion of the needle into the vein by seeing the blood naturally regurgitate into the syringe. However, if the blood is not seen, pull the plunger to check the blood being sucked into the syringe. Once the needle is thought to have clearly entered the vein, slowly inject 0.1~1ml of the sclerosing agent. Here, caution should be given to prevent extravasation.
When treating veins of 1mm or less, it is not easy to pull the plunger as this could often rupture the vessel. Avoid pulling the plunger when treating very thin veins and check for disappearance of veins while slowly injecting low concentration agent.
Inject the sclerosing agent by pushing the plunger. If resistance is felt while pushing the plunger, immediately stop injection as this means the needle lies outside the vein. Moreover, if blanching and swelling of the skin occurs during injection, this also means the needle is outside the vein and injection should be stopped immediately.
The amount of sclerosing agent that can fill the blood vessels lying within the circle of 3-5cm in diameter around the injection site is enough to be a single injection dose. Injecting less than 1ml in one site lowers the risk of neovascularization or telangiectatic matting in the outskirts of the treatment area. Avoid injecting a large dose at a high pressure (over 1ml) or blanching and swelling of the skin over 1-2cm wide.
The order of injections can be random. However, treatments are generally carried out from top to bottom, from the thigh to the calf, ankle and foot. Injection in the ankle and foot tend to cause more frequent pain and edema.
Moreover, treatments are carried out from larger to smaller veins (feeding reticular vein > venuletases > telangiectatic webs or networks > smallest or most isolated telangiectasia). Large veins, that is, veins over 2~3mm in diameter are blue and injecting them first simultaneously treats capillaries 1-2mm thick as the sclerosing agent seeps into them. If the blue veins disappear from injection but red capillaries remain, change the site and inject the sclerosing agent.
The thickness of veins that can be eliminated with sclerotherapy is thought to be 1mm. However, some patients want veins less than 1mm thick to be also eliminated. It is important to clearly explain to the patient in advance the limits of the treatment. Veins less than 1mm thick can be eliminated using a 30G needle very cautiously.
The doctor or nurse attaches a cotton cushion along the course of the treated vein immediately after injection of the sclerosing agent. Then, elastic bandage or compression stockings are used to pressurize and fix the treated area.
When a large dose of sclerosing agent is injected, instruct the patient to walk for about 10 minutes after treatment to prevent deep vein thrombosis.
Elastic bandage should be removed in 24 hours. Medical compression stockings should be continuously worn for at least 3 weeks for small vein treatment and for 6 weeks for large vein treatment. Use medical compression socks with 30~40mmHg of pressure strength although the types of medical compression stockings may differ depending on the severity of varicose veins.
After an interval of 1-2 weeks, other veins can be treated. Wait for at least 4-6 weeks for sclerosis and fibrosis to take place in injected veins before reinjection.
Each vein requires about 2-3 injections and skin color changes can occur in 70~80% of cases. It is advisable to explain to the patient in advance that color changes can disappear gradually within 6-24 months.
Instruct the patient to avoid strenuous exercise including jogging for 1-2 weeks after treatment.
The veins could turn darker in color or bluish green after treatment. Observe outcome 1-2 weeks after sclerotherapy. When tenderness and severe color change occurs, thrombus should be removed. I use a 18G needle to extract thrombus. This process is very painful but does not require anesthesia. If the patient is very sensitive to pain, I inject lidocaine prior to extraction. After thrombus is squeezed out, apply the cotton cushion along the course of the vein. Pressurize the treated area with elastic bandages or compression stockings.
-To be continued-


