


Writing this series was rewarding for me in that I suggested a new paradigm for filler treatment. I want to point out again that it is important to communicate with patients about the sites where patients want to beautify, change or look younger. After taking pictures, I explain to patients about overall image and sites to be pointed out, not just one site. After designing face, I perform total filler therapy as it called Images by filler. For this last chapter of Images by filler, I will introduce you how to choose relevant cases and patients who are not suitable for Images by filler. In addition, I will make sure to share my vision about filler treatment. Some patients want filler procedure for more than 5 sites, and some sites are recommended by me. It is important to communicate with patients to adjust what the patient wants and what the doctor recommends.

[Advertisement] SKIN THE NEXT – Manufacturer: NEXGEN(www.nexgenbiotech.com)
Checkpoints before filler injection
1. Bilateral symmetry
Many people tend to have a better appearance when they take pictures from the left side of the face than right side (mostly when the right hand is the dominant one). First of all, the zygoma is different between the left and the right side. When you see the blue circles in the <Figure 1>, the left zygoma shows anterior, 45° and lateral zygoma are softly connected in a gentle curve. The right zygoma, on the other hand, rarely shows 45° zygoma and the anterior and lateral zygoma are nearly directly connected, forming a relatively sharp angle. As for the malarfat pad, sagging is more prominent on the right side compared to the left side.
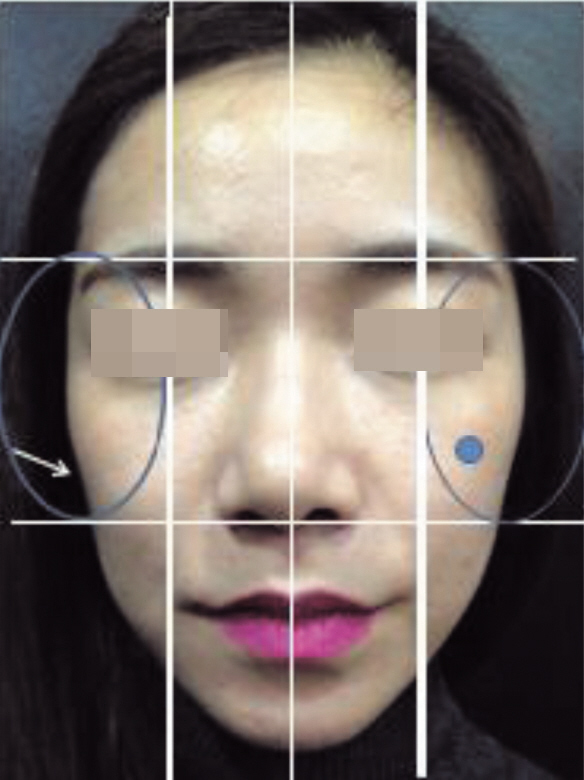
Figure. 1 Facial symmetry analysis before procedure
The perioral mound also appears more prominent on the right side. The shape of the zygoma and malar fat pad sagging was affecting the right and left facial line differently. In most cases, the right zygoma volume is smaller than the left zygoma and the malar fat pad sagging is more severe on the right side. It is important to achieve bilateral symmetry considering these aspects. As for Indian band, I usually inject relatively more volume to the inferior and lateral portion of the right zygoma (arrow in the Figure 1) to make more volume to the outer side. For the left Indian band, I usually inject filler to the anterior zygoma (blue dot in the Figure 1) to get the volume. Bilateral symmetry can be achieved by this method (Figure 2).
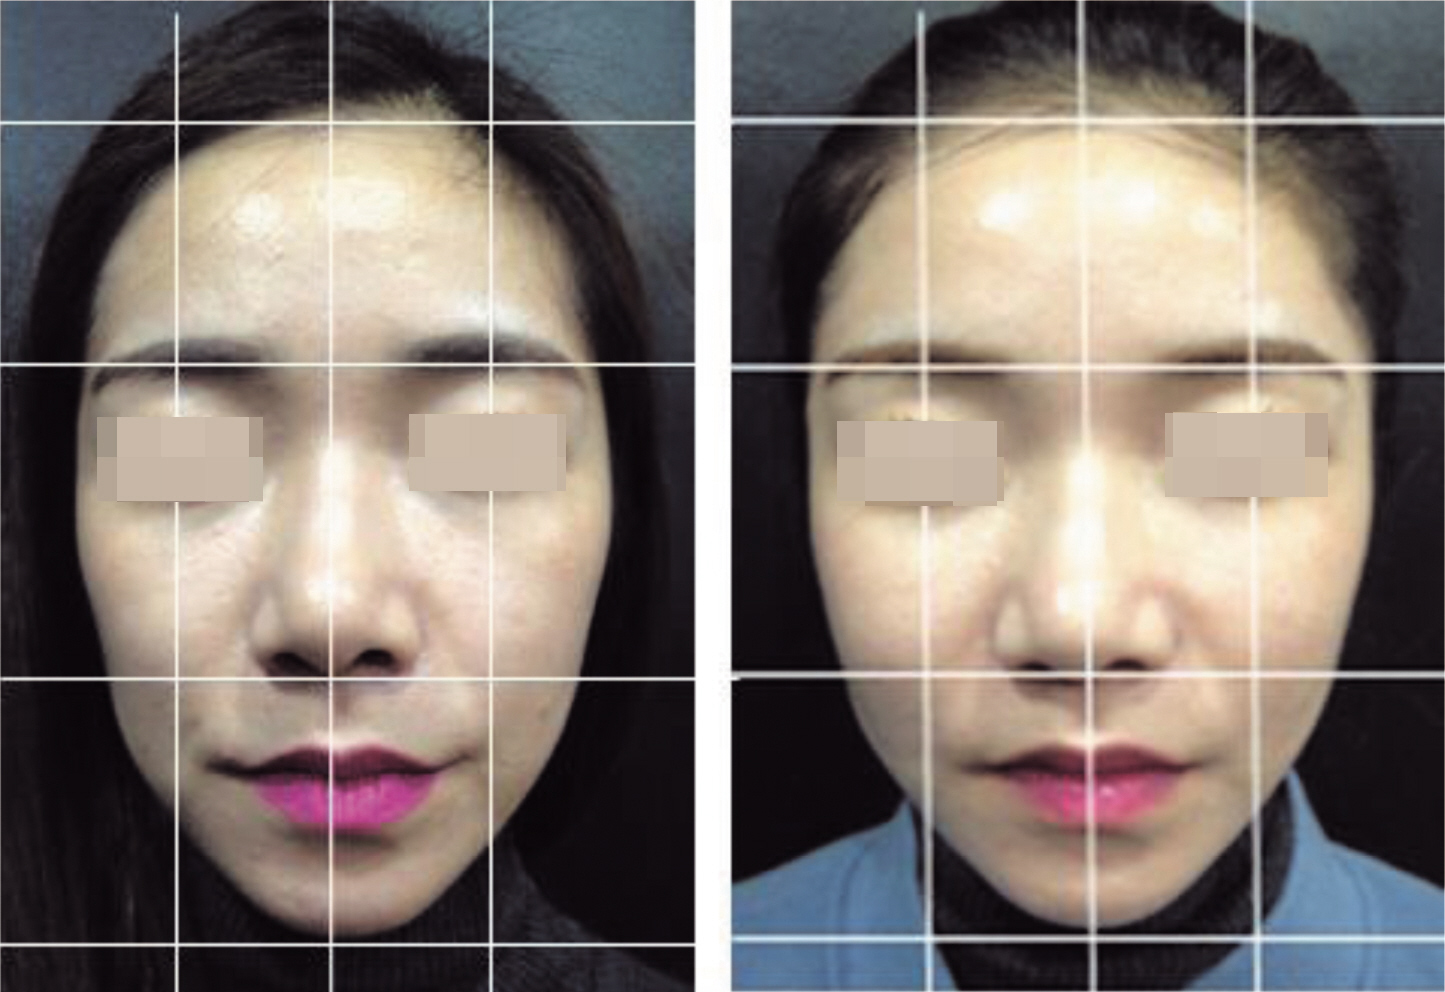
Figure 2. Making symmetry (Images by filler; before and after the procedure)
2. Predicting the appearance before the procedure to see if the look suits the patient
Clinicians can demonstrate what tear trough, Indian band, sunken cheek, submalar hollow and marionette lines would look like before the procedure by lifting the skin upwards. Forehead and temples cannot be demonstrated directly but can be explained by other similar cases. Nasal root should be checked if the overall nose shape does not look too long or the eyes look pressed to the center. Patients should be explained about the limitation of filler procedure for the tip of the nose. As for the chin, pinching test can be used to demonstrate the expected look. As mentioned before, chin is a very important area and patients should be reminded that U or V line can be made without making the face too long. Masculine chin with wide and flat shape may change to a feminine appearance by adjusting the tip of the chin. The skin should be checked whether it’s hard or soft to ensure enough space for filler injection.
3. Predicting the amount of filler to be injected
Unlike autologous fat transplantation, Images by filler can generate additional charge depending on the amount injected. It is necessary to notify patients in advance about how much would be injected to each site. Clinician’s estimation is important, but it is also important to check if the patient wants less or more volume during the counseling.
4. Determining whether filler injection, lasers or botulinum toxin is preferable
When we inject filler to the left sunken cheek and left submalar hollow, that area may look larger and exacerbate asymmetry. Because the left cheek is generally larger than the right cheek. Wrinkles and folds may be improved but the face may look bigger at the same time. In this case, botulinum toxin can be used to the left masseter muscle or lift up the face, thereby achieving asymmetry of the face.
Patients not Suitable for Images by filler
Below are my analyses of patients who are not suitable for Images by filler, including those who may have less satisfaction and those who may not be improved by filler injection.
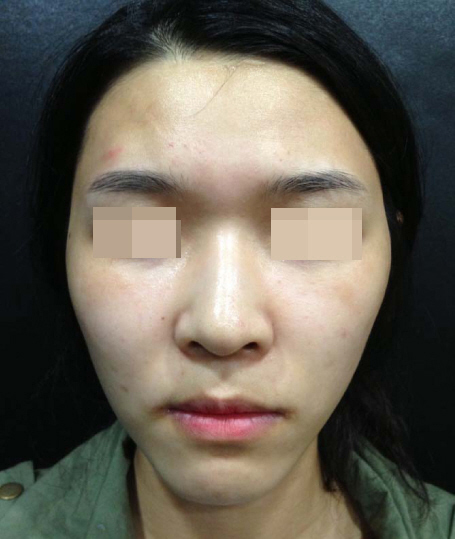
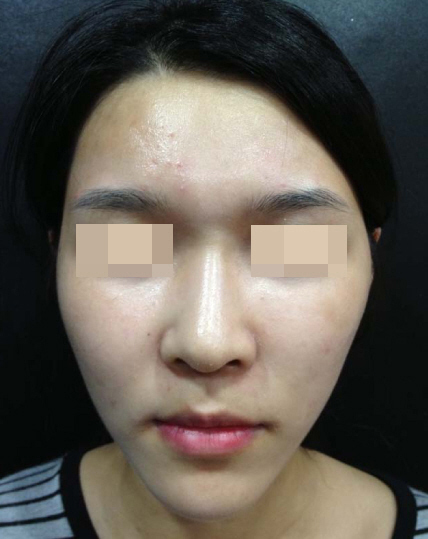
Figure 3. Images by filler in a patient (F/29) with prominent 45°, lateral zygoma
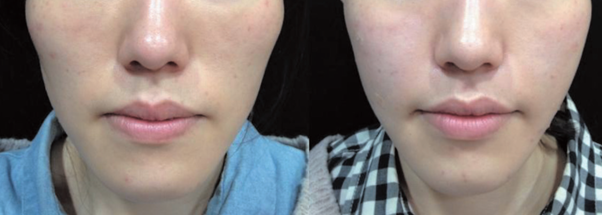
Figure 4. Images by filler in a patient (F/32) with particularly developed lateral zygoma
The first case is the patients with noticeably developed bony prominence (Figure 3 and 4). Prominently developed zygoma is major obstacles of midface correction by Images by filler, because of the difficulty of finding empty spaces for filler injection. In case of <Figure 3>, there was no other way but to make the anterior zygoma augmentation, which was also limited by the inability to inject as much as necessary. Patient satisfaction could be increased by injecting filler to the nasolabial fold, chin, and forehead (Figure 3). The second patient (Figure 4) had well-developed bone structure, especially at the lateral zygoma and the mandible. As a result, the patient could experience better satisfaction than <Figure 3> by filling submalar hollow, which made softer facial outline. The patient was satisfied that the face could become smaller. However, it would be more advisable to recommend facial bone contouring first before Images by filler. Next case is the patients with sagging cheek, who could not achieve satisfactory results after filler injection (Figure 5).
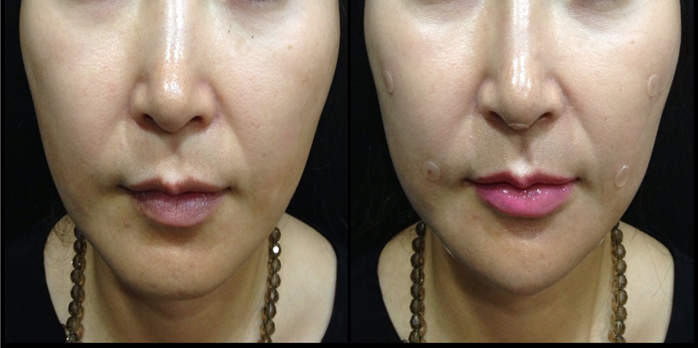
Figure 5. 43/F, who could not achieve satisfactory results from the procedure due to severely sagging cheek
In this case, the face looked larger due to the severely sagging cheek, although the zygoma augmentation and nasolabial fold filler injection were good. Thread lift and laser lifting should be combined in such patients. Our patient could achieve better results in the end by combining Doublo®, Duet® and Polaris® lasers. Patients with severely sagging cheek should be reminded that filler injection alone cannot provide satisfactory results and that other lifting therapies should be combined.
Epilogue
We have looked various cases who are not suitable for Images by filler. It is clinician’s responsibility to predict who would be most suitable patient for filler injection. For proper predictions, clinicians need to have aesthetic sense as well as extensive experience. Filler is not just a material that can fill in the folds but a tool to carve a statue. Clinicians will be able to produce original works if they performed the procedure as if creating an artwork. Patients expect to change their face younger and more attractive by simple procedure without having interference with daily life. As the expectation grows higher and higher, some patients even expect to see as much dramatic change as a plastic surgery. Filler is the most optimal tool to meet their expectations. A competitive clinician should be able to design the overall face for a more complete look, not just focusing on an area. I want to further develop Images by filler until it could gain as much attention as it deserves in the filler market. I would like to end this series by introducing my Images by filler case here (Figure 6). Thank you for having such a great interest in Images by filler so far.

Figure 6. Images by filler (27/F) treatment sites: eye roll, Indian band, nasolabial fold, cheek and chin (front view)
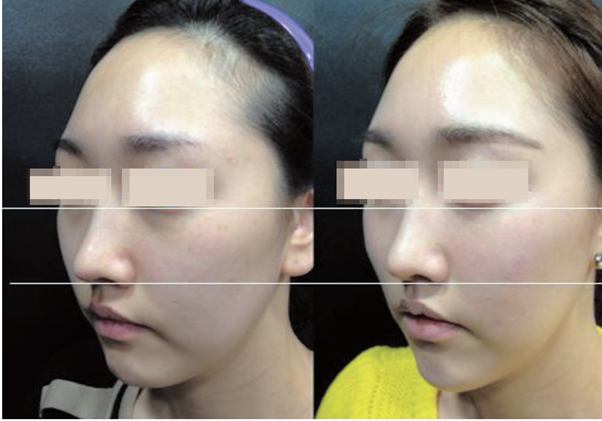
Figure 7. Images by filler (27/F) treatment sites: eye roll, Indian band, nasolabial fold, cheek and chin (45° view)
▶ Previous Artlcle : #3.T zone Procedures and Other Case Types